HOWTO
How to Make a Skateboard Ramp Yourself – Easy Guide
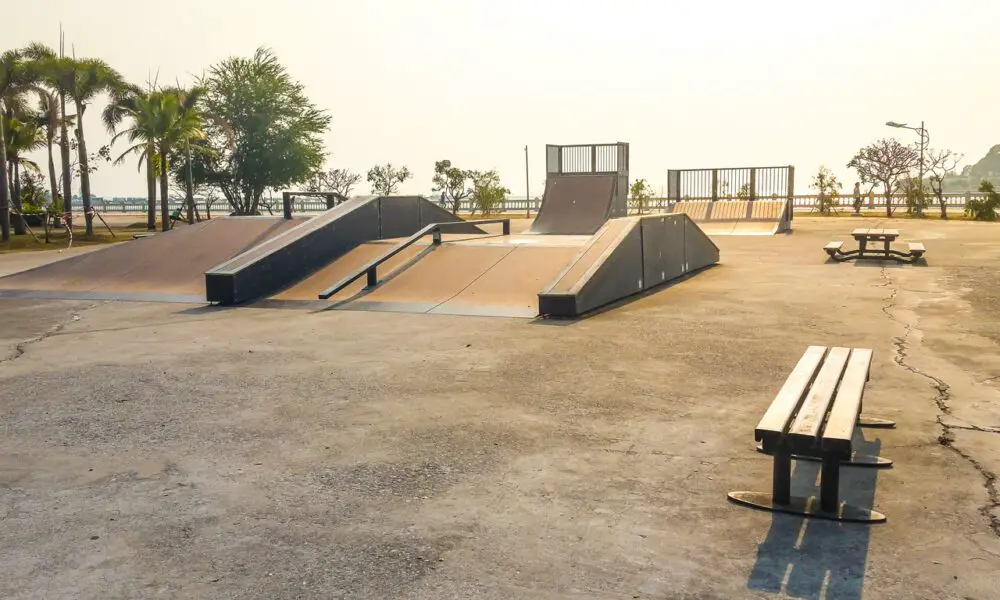
Have a craze for skateboarding and want to make your customized skateboard ramp according to your requirements and personality, then you must need some guidance on how to make a skateboard ramp. Skateboard ramps are used for vert skateboarding. Skateboarders transition from horizontal to the vertical plane using a ramp and thus learn to perform different tricks. Building a ramp at your place is a time-consuming, tiring, and space-occupying job. Vert skaters use wider deck bigger wheels skateboard. While most people prefer street skating as its more accessible, some passionate ones want to learn and enjoy the sport to the next level and thus need to search for a ramp.
A skate ramp is a form of a half-pipe with a vertical transition. If you are extremely interested in the sport and want to own a ramp of yours, look for space to have an idea of what size ramp you can afford. Vert skating is quite difficult for skaters because, unlike other skating techniques, it requires very long practice. Once you are sure about your persistence and ambition to learn the skill, look for varieties of ramps available and which one you want.
Building a Skateboard Ramp
Types of Skateboard Ramps
Before going into the detailed process of how to make a skateboard ramp, lets first discuss the different types of skateboard ramps so we can start making the one we like.
- Launch ramps
Launch ramps launch the skater into the air. They are designed without a deck.
- Box jumps
Two kicker ramps on opposite sides with a flat surface in between. This setting allows easy transition between different skating techniques.
- Half pipes spines
Place two-quarter pipes together and get a half pipe. This gives the rider a surface to move back and forth and transition in the air.
- VERT ramps
Two vertical walls with a flat bottom for pro skaters. Half pipes range from 7 to 14 feet high. Most constructed from wood or concrete in larger skate parks.
- Pyramids
A great option for skaters to flat skate and flip both. Its also called double box jumps as both sides can be used for skating. Skaters can approach from whatever side and flat land on others.
- Quarter pipes
This option is for experienced skaters to perform tricks in the air. On reaching the top of the ramp, the skate nose points straight.
- Spines
This form of the ramp has two-quarter pipes in opposition to each other. It allows the skater to transition mid-air without losing momentum.
Initial Steps of Building a Skateboard Ramp
Building a skateboard ramp doesnt require expensive stuff, but it’s time-consuming and effort putting work. Follow the steps listed to get the result of your choice.
Deciding the place to built a skateboard ramp
Skateboard ramp can be built indoor as well as outdoor. It depends upon personal preference as each has its pros and cons. Building a skating ramp outside while being exciting for you will cause noise, irritating your neighborhood. Outside skateboard ramps are preferred for less crowding and a lot of space to perform tricks. Skate ramps in the open tend to accumulate more dirt and grime, and thus you need to wash your skating board more often. Indoor skateboard ramps have less area to perform tricks and become crowded.
Whether you want to build your ramp in open space or indoor, map out the area you want to use and measure its dimensions. It gives you an idea about the limits of the size of the ramp. The Skateboard ramp is not supposed to cover the whole area, that no space is left for flipping or skating. The ground has to be flat and dry to build a ramp.
Things needed to make a skateboard ramp
Check the list of the stuff mentioned next. You need to start with your project. Gather all the enlisted stuff in one place and then start with the process.
- Plywood
- Screws
- Drill machine
- JigSaw
- Measuring tape
- Steel pipe
- Paint
Plywood thickness and size
The wood measurements will vary according to the type and size of the ramp you want to build. The hardware store from where you bought the wood can guide you best about what kind of wood is best for your plan. The tools like jigsaw or drill machine can be purchased from the shop or borrow from a friend or rent them from someone as this will save you money. Be careful of your budget while looking for required material. Building a skateboard ramp can become expensive if fine details are added, making wise choices wherever you can while executing the plan.
Ramp lumber shaping
The plywood bought needs to be cut according to the plan. Are you familiar with woodwork? If not, it’s better to get help from someone experienced as this step requires caution, effort, and time. The most important step of a plan is shaping. If you make a mistake here, the whole plan is ruined. If you build a basic mini ramp, you can test your skills; otherwise, get help from someone else.
Once the wood is in proper shape, the rest is easy and quick. For those building an outside ramp, get pressure-treated wood. Pressure-treated woods are preserved using the copper solution. This step adds to their life span. If you opt to save a few pennies and go for the normal ones, they will rot easily within a year and cause you more damage than good.
In outdoor locations where it often rains, the wood gets damaged pretty quickly, so use skateboard paint to paint the wood surface and save it from the damage. The surface can be covered using a rain cover so water will not pool above the wooden surface.
Making the Skateboard Ramp
- Cutting ramp sides
Start by cutting ramp sides from plywood. Use chalk or marker to draw the shape and then cut it out using a jigsaw. Be careful with cutting if it’s your first time. Wear comfortable loose clothing, and make sure to use gloves and goggles for protection.
- Nailing ramp supports
Next, nail the supports. Add good nails as it will give enhanced support to the ramp. Attach the second line to the base of supports. Attach the ramp sides to the front anchor.
- Attaching supports to ramp
Start from the top by attaching 26 ramp support first and 24 next. Place the supports 8 inches apart. The 2-inch surface should be facing upward. Two 24 can be placed underneath 26 so that the structure has extra stability and is unlikely to break.
- Attaching plywood sheets
Place two 46 above first 26 support. Nail it properly. Be generous while using nails, so it’s firmly held in place. Next, screw the upper plywood sheet. Next, screw the bottom sheet but let it overhang the ramp, so the skater gets a smooth transition from the skateboard ramp to the ground. Put screws in all supports.
- Covering the topmost surface
Cover the plywood surface with two sheets of Masonite. Screw them in place, screwing every 6 inches. Covering the top plywood layer is a choice as plywood is cheap but not weather resistant, so it has a short life span. Similarly, a satellite is costly and used by professional skaters to be heavy for your budget. Plan according to what you can afford.
- Finishing the corners and edges
Sand the plywood edges and corners.
- Attaching steel plate
Next, drill a hole in your steel plate for screws and screw it to the bottom surface of the ramp.
- Protective measures
Protecting the surface from the weather is important. Use polyurethane paint to cover the plywood surface; it’s a cheaper option as spar urethane is expensive but a better protecting one.
During rain, cover your ramp using a rain cloth cover. Make sure water doesn’t keep standing on the ramp surface for long. During snowy weather, use a shovel and throw away the snow so moisture will not enter through wood and crack it later. Water damage to wood can cause cracks, splinters, and chipping off. The wooden splinters hurt the skin very much and can cause a bad infection for most people.
To Wrap it Up
Skateboarding ramps were designed to learn different skating tricks. They are very popular among pro skaters. Skate parks have different types of ramps available, but if you want to own one, it’s also possible. The next thought will be how to make a skateboard ramp. With just some little effort and you’ll own your skating ramp. It’s up to the skater to decide the design and size of the ramp. A ramp built at home can be indoor or outside. According to the dimensions of the area available, make a blueprint of the design of your ramp. Get all the needed stuff. Cut out all shapes and supports and nail and screw everything.
Finish off using a top protective layer if you want to prolong your life span. Smoothen the edges and corners so that cracks and splinters can be avoided. Riding surfaces will increase the budget, but they help delay damage that destroys wood. In wet weather, cover your ramp surface using a protective rain cover, so water doesn’t seep into the wood. All pro skaters and those who intend to master this sport can build a ramp at home using either wood or concrete. The wooden ones can be made moveable to be stored when not in use while the concrete ones permanently occupy the surface.
Once you are all done building the skateboard ramp, its time to pick the best skateboards for beginners and start skating.
Important FAQs
Can plywood be used as the top surface?
Yes, plywood can be used as a top layer, but it will have a short life. It will get easily damaged by environmental conditions.
Is it necessary to use some other material top layer?
Using a top protective layer over plywood is to lengthen the life span. If you can afford to increase the budget a little more, then go for Masonite or satellite. With these surface covering sheets, the rider will have a good grip. Pro skaters use indestructible and water-resistant riding surfaces because they are expensive. Pressure-treated plywood is more weather resistant than the normal one, and it will cost only a few pennies more, so it’s a great option.
What should be used to build a ramp wood or concrete?
It depends mainly on personal budgets and environmental conditions. Both have their pros and cons. Wooden ramps are easy and straightforward to build as compared to concrete. They can be made moveable and less costly, but the problem is wood decays after a certain period of time. Although riding surfaces can protect the wood for years, it will eventually decay.
Concrete is expensive and requires much skill to build the design. It’s immovable. The surface is permanently occupied. If you can afford to get professional help, then go for concrete in case of outdoor ramps as they are exposed to extremes of weather and get damaged.
Tom Rohrer breaks down every step of a nollie treflip (nollie 360 flip)–from foot position, weight distribution, shoulder position, and popping and flicking technique in his latest YouTube tutorial.
Check out his Tom’s Tutorials channel for more skateboarding tips and tricks.
Tom Asta is back to help you get better at skating. This time, he goes beyond the basics and teaches viewers how to improve their ledge game. Watch the video above, and check out his channel for more of his skateboarding tutorials.
Tom Asta continues to share skating tips and tricks on his YouTube channel. This time he covers how he goes about nollie skating on ledges, bumps and handrails!


How to Do a Nollie Treflip
Tom Rohrer breaks down every step of a nollie treflip (nollie 360 flip)–from foot position, weight distribution, shoulder position, and...


Improve Your Ledge Game with Tom Asta’s Tips
Tom Asta is back to help you get better at skating. This time, he goes beyond the basics and teaches...

Tom Asta Shares the Keys To Skating Nollie
Tom Asta continues to share skating tips and tricks on his YouTube channel. This time he covers how he goes...

Tom Asta Shares the Keys to Locking In Flatbars
Tom Asta continues his mission to share his skateboarding knowledge on his YouTube channel. This time around, he imparted the...

Matt Beare Bares the Secret to Taking Flat Tricks to Other Spots
In his latest YouTube video, Matt Beare of “The Daily Push” bared the secret to taking flat tricks to other...

Learn How to 360 Flip from P-Rod
Paul Rodriguez gave tips and tricks on how to execute the 360 flip in his latest YouTube video. The Primitive...
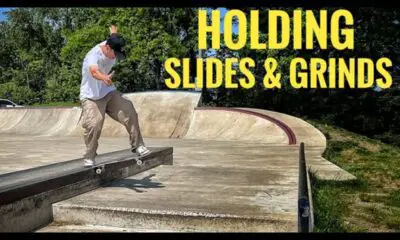

Tom Asta Shares the Keys to Holding Slides and Grinds
In his latest video, Tom Asta shared the keys to holding slides and grinds. You can watch more of Tom’s...

Tom Asta Explains the Break in Process for New Trucks
In his latest Youtube video, Tom Asta breaks down the process of breaking in new trucks. Tom has been sharing...

Kevin Braun Shares His Favorite Skateboarding Spots

Vans Skateboarding x Spitfire Wheels

Baker Has a Death Wish Part 2

Tony Hawk and Rodney Mullen Team Up for ‘Darkslides & Secret Tapes’

Giovanni Vianna’s Top 5 SLS Scores of 2023

Kevin Braun Shares His Favorite Skateboarding Spots
Get the inside scoop on Kevin Braun’s top skateboarding spots and the epic tricks that he executed there in this...

Vans Skateboarding x Spitfire Wheels
Vans Skateboarding and Spitfire Wheels have teamed up to create a durable and adaptable footwear and apparel collection that draws...
Baker Has a Death Wish Part 2
After 16 years, Baker and Deathwish delivered another must-watch video. “Baker has a Deathwish Part 2” runs for more than...


Lucas Alves “Illuminated” Powell Part
Lucas Alves performs incredible stunts on California’s proving grounds and ends with a powerful finale in Hollywood in his “Illuminated”...

Rough Cut: Ishod Wair’s ‘Spitfire’ Part
Get behind the scenes of Ishod Wair’s Spitfire part in this rough cut released by Thrasher Magazine.