HOWTO
How to Skateboard for Beginners
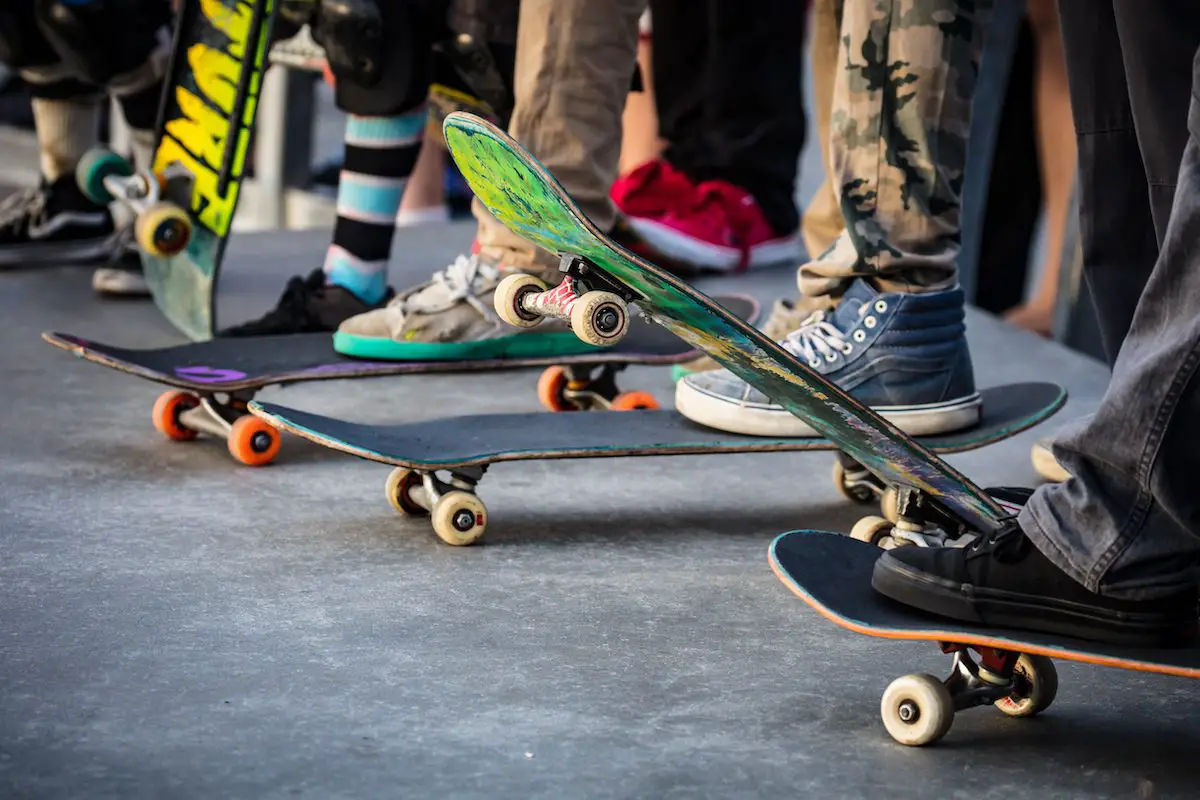
A skateboarder in action at Venice Beach Skate Park in Los Angeles, California, USA
For some, learning to skateboard is as daunting of a task as asking their crush out for the first time. For others, they just want enough coaching to be able to ride without falling every three seconds.
Whether you’re looking to become the next Nyjah Huston or simply want to learn a few tricks you can do in your spare time, it all starts with this question: “Just how the heck do I stand on this thing?”
We’ve all been there before. If not with skateboarding, with something else.
Sometimes our interests and innate talents don’t always align. Nevertheless, there are helpful guides out there that help catch us up to speed and get the balls (or wheels) rolling.
And this is one of them.
Table of Contents
1) Choosing Your Skateboard
When it comes to beginning your skateboarding journey, the first thing you’re going to want to do is to choose your board. Now, of course, you could always practice on your friend’s or sibling’s skateboard, but if at all possible, it’s best to get your own so that you get used to it.
Board Measurements
Okay, so while getting a skateboard from a brand you like or with a design that matches your personality is great and all, the main reason you want to pick out your own skateboard is to ensure it’s the right size for you.
While it mainly comes down to preference and style of riding, there are three main measurements to keep in mind: width, length, and wheelbase.
Width – The most important measurement of a skateboard’s deck and numbers you’ll often hear when people are referring to their boards.
Most decks fall between 7.5” and 8.5” wide. The width of your board should fit your foot size and skating needs.
Riders who are taller/ those with bigger feet, generally tend to pick wider decks. The same goes for people who want to skate vert ramps. This is because the wider surface both gives them more stability as well as more room to land on.
Smaller riders and street skaters usually go for shorter widths. The smaller size, of course, makes sense for smaller bodies and smaller feet: less work to control.
The main reason, however, why street skaters often prefer smaller boards is because it’s easier to flip their boards with the smaller stature and lighter weight. There’s more maneuverability.
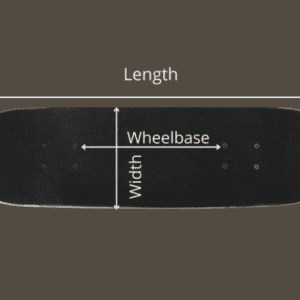 Length – Measuring from the tip of the nose to the tip of the tail, most skateboard lengths come in between 28” and 32”. For most riders, board length won’t be a major concern.
Wheelbase – The wheelbase refers to the distance between the inner front and inner back mounting holes.
Wider wheelbases provide more stability while also making your turns wider. While some skaters may benefit from the extra stability, others enjoy making sharper turns. To achieve this, they use narrower wheelbases. While they do have less stability, they’re afforded more maneuverability which can help when performing quick turns.
Again, remember that the most important aspect of your board is its width. That, and how it makes you feel.
This video by Braille Skateboarding does a good job of explaining the importance of width and preference. Check it out to get some more insight on measurements.
2) Figure out Your Stance
Speaking of feels, you’ll definitely have to get a feel of how to comfortably stand on the board.
There are two, sorta three…but two main stances: regular and goofy.
In regular stance, your left foot leads and you push with your right. In goofy stance, your right foot leads and you push with your left.
Then, there’s mongo.
Mongo stance, which is less common and less encouraged, refers to when you push with your front foot instead of your back. You can push mongo either regular or goofy, though it’s often better to learn one of these rather than stay mongo.
The Slide Test
If you’re unsure which stance works best for you, an effective way to figure it out is by performing the slide test.
Doing so is mad simple with low risks.
- First, put on a pair of smooth socks.
- Secondly, find a smooth surface like a hardwood floor
- Finally, build up a little speed then land and slide across the floor
Generally, the foot that you lead that slide with will be your lead foot.
Another, fairly low-risk way to figure out your stance is by hopping on a board and having a friend gently push you forward. While it may seem a little scary if you’re brand new, do your best to use this as a learning experience.
Lean back and forward while on the board and see how your body feels when leading with your left vs leading with your right.
After a few minutes of this, you should have a good idea of which stance is right for you. If not, you should at least have an idea of which one you’d like to learn the basics in.
3) Getting on Your Board
All riigghht, look at you. You made it to the fun part: getting on your board.
Now, if you figured out your stance with the help of a friend, then you’ve already beat this level. Congrats.
Next thing though, those training wheels come off.
To get on your board by yourself:
- Grab your board and go near a wall, bench, or something that you can use to support you while you practice.
- Place the board down with the nose facing the wall.
- With your knee slightly bent, place your lead foot at the front of the board near the front truck bolts.
- Using your bent knee and the wall for support, lift your back foot onto the back of the board. Place this foot perpendicular (width distance) to the board.
- Now that both feet are on the board, turn your front foot so that it’s also perpendicular.
- And now, balance!
- Once you’ve got this down, repeat the same steps without support and golden, Ponyboy.
If you need a visual, as most of us do, check out this video here.
4) Pushing
Now here comes the kicker…or pusher.
As a beginner, pushing on a skateboard might feel impossible. “How am I supposed to put my foot down while this thing is moving?”
It can be difficult to imagine.
Learning to do this, however, is essential to mastering the basics of skateboarding. Well actually, it is skateboarding. It’s not like you’re looking to become the next best balance boarder.
Here’s how to push:
- Put your front foot straight (length distance) on the board just a little behind the front truck bolt. Leave your knee slightly bent
- Keeping your balance with your front foot, use your back foot to propel yourself forward
- Practice this walk-pushing a few times before putting both of your feet on the board
- After getting comfortable with walk-pushing, pick up your back foot and place it perpendicular (width distance) on your board.
- Right after, turn your front foot so that it’s also perpendicular to the board. Your feet are now in the standard riding position. Holding out your arms may help with balance.
- To push again, turn your front foot so that it is straight again
- Bend your front knee, and with your back leg, slightly kick out in front of you and land your foot on the ground as if trying to do a light scoop
- Once you regain momentum, repeat the first five steps.
And there you go. As a beginner, it can take some time to get into a groove. It’s all good.
Just take it slow and with practice, you’ll get it down.
Check out this video here if you need more help.
5) Turning
Learning to turn on your skateboard is the next step you’ll want to take..well you already took steps when you learned to push.. so, it’s the next turn of events.
Puns come and go.
Just like obstacles and people that you may have to dodge with your new turning abilities.
There are two ways: leaning to turn and kick-turning
Leaning to Turn
If you’ve already learned to balance on your board while moving, leaning to turn should be fairly simple.
To do so:
- With your feet perpendicular to the board, apply pressure on either your toeside or heelside to begin leaning in that direction
- Toeside = Where your toes are
- Heelside = Where your heels are
- To maintain your balance while turning, bend your knees slightly and lower your center of gravity.
- Use your arms to help keep your balance
Kick-turning
Kick-turning helps when you want to do quick turns. Before trying them while moving, learn how to do them while standing still.
To perform:
- Start with your feet perpendicular to your board
- Move your back foot to the tail of your board. Be careful not to apply pressure until you’re ready to turn.
- Slightly apply pressure to your back foot. This will raise the board and your front foot with it. Remember to evenly distribute the weight between both feet and avoid having the tail hit the floor.
- With your shoulders guiding your movements, steer your board either toeside or heelside.
- Just as with leaning to turn, using your arms may help maintain balance.
The same rules apply to doing kick-turns while moving. Just remember to start slow until you build up your confidence and comfortability.
The tightness of your trucks dictates how sharp and wide your turns will be. It’s up to you to decide how tight or loose you want them to be. Know that, however, there are certain benefits and drawbacks to either side.
Tighter trucks will feel more stable but offer less turning capability. And looser trucks do the opposite; more turning capability at the price of some stability.
It’s best to test out some boards to get a feel of what you want.
6) Stopping
Now that you know how to go, you gotta learn how to stop.
And, for some, doing so effectively takes just as much practice as learning to push.
Because of that, pay close attention to these four beginner-friendly stopping methods.
That way you learn the basics all the quicker.
Foot Brake
Foot braking is the most common form of stopping and is easiest to perform at slow speeds.
There are two versions of the foot brake: stomping and sliding.
To perform a stomping foot brake:
- While moving, make sure your front foot is straight and slightly bent at the knee.
- Turn your back foot till it’s a little over a 45-degree angle with your front foot and the board.
- Bending your front knee, lower your center of gravity as you prepare to carefully stomp on the ground with your back foot.
- Stomp on the ground with your back foot. Be careful not to place too much pressure on the floor where your back foot is now stuck, leaving your front foot (and the rest of your body) to get pulled by the still moving skateboard.
- Do this until you come to a complete stop.
To perform a sliding foot brake:
- While moving, make sure your front foot is straight and slightly bent at the knee.
- Turn your back foot till it’s a little over a 45-degree angle with your front foot and the board.
- Bending your front knee, lower your center of gravity as you prepare to carefully slide on the ground with your back foot.
- Carefully apply pressure with your back foot while keeping most of the weight on your front foot.
- Do this until you come to a complete stop.
The sliding foot brake is a helpful stopping method when you’re going too fast to do a stomping foot brake and you’re not quite comfortable with other stopping methods.
Still, it’s important to note that performing sliding foot brakes will quickly wear down your shoes.
Heel & Tail Scrape
The tail scrape takes what you learned in kick-turning and applies it to halting your forward momentum.
To perform:
- While moving forward, have your feet perpendicular to the board.
- With your front foot near the middle of the skateboard, move your back foot onto the tail.
- Press down on your back foot until your board begins to scrape against the ground. This is an indication that you’re slowing down.
- Once you stop, you can either hop off the board or lean forward to begin rolling again
Note that performing tail scrapes often can lead to razor-tail. It’s when the tail of your board begins to lose its protective coating and starts to thin out.
If it gets too thin, pieces of your tail can begin to chip off.
A heel scrape is very similar to a tail scrape, but instead of using the bottom tail of your board to slow yourself down, you use the heel of your shoe.
To perform:
- Do steps 1-2 of the tail scrape. Instead of using your tail, move your back foot further back until it’s slightly hanging off your board.
- Apply pressure to your heel until you come to a stop.
- Use your arms to help maintain balance.
Also, it’s important to note that repeatedly doing heel scrapes will eventually wear down your shoes so keep that in mind.
Carve to Slow Down
Carving refers to performing a series of turns repeatedly, alternating between toeside and heelside each turn.
While it is a method of gaining speed, carving while moving is also a great way to slow down.
To perform:
- With your feet perpendicular to the skateboard, repeatedly perform toeside and heelside leans, alternating between the two
- Instead of propelling yourself forward in a scooping-like manner, think of applying slow, yet smooth pressure to both of your feet as you perform each turn
- Your speed will eventually reduce giving you time to perform a foot brake, heel or tail scrape, or jump off your board safely.
Use Grass or Gravel
Another, surprisingly practical way to stop on a skateboard: roll onto some grass or gravel.
Now, if you’re going pretty fast, this method might send you flying forward if your momentum stops too abruptly.
Remember to bend your knees and sort of scoop the board forward as you slow down, using your arms to help keep your balance until you’re fully stopped.
7) Learning to Fall
Yeah, it’s going to happen people.
Whether by rock, curb, or crack, or during high jumps and wild stunts; at some point or another, we’re all going to fall off our boards.
What’s important though is that you get back up.
That, and learn to fall better.
Oh yes, there’s a science to this.
Try Not to Panic
“What do you mean? ‘Try not to panic.’ I’m falling. Like, towards the ground. That’s high-velocity impact we’re talking about man.”
Understandable, yes.
But, it’s even more important to remember that if in the face of dirt that’s preparing to meet your face for an evening’s lunch that you might have missed; if you can, instead, keep your cool and position your body in a way that minimizes the overall damage or avoid eating dirt entirely, then you’d be much better.
Right?
So, when it comes to those panicky moments, do your best to remember that you still have time to adjust your posture. Don’t just give up.
Brace yourself.
But Don’t Use Your Hands too Much
High impact falls can fracture or break the bones in your hands and wrist. Of course, there are certain wrist guards like the 187 Killer Pads Derby Wrist Guard that will help minimize the damage.

Still, if at all possible, perform a quick shoulder roll or tumble to protect your body from severe harm.
Now, once again, if your face is about to collide with the unforgiving pavement, toss this out the window and use your hands.
Just don’t lead your falls with always bracing to use your hands.
Use your momentum, instead, to propel yourself to a better falling, or standing, position.
Use Protective Gear
As a beginner skateboarder, using protective skating gear is a great way to increase your safety while still helping you learn the craft.
Helmets like the Triple Eight Dual Certified Helmet or the Montana Skateboard Helmet are excellent choices for headgear.
The Triple Eight helmet meets the ASTM F-1492 Skate safety standards, making it an ideal selection for riders looking for protective gear with a trustworthy back record.
It features an adjustable chin strap and two sets of moisture-wicking Sweatsaver Fit Pads.

The Montana Skateboard helmet is CPCS certified and features an open vent for breathability, moisture-wicking fabric to reduce sweat in your eyes, and adjustable straps, and an adjustable dial system to enhance the comfort and feel of the helmet.

Falling on your skateboards is one of those things you have to experience to learn.
As scary as it sounds, employ these tactics and protective gears and you’ll be more prepared for the falls that eventually lead to the great tricks.
Looking for more info on how to fall properly? Check this video out here. They do an excellent job of explaining what to do, and what not to do.
8) Practice and Perfect the Basics
Once you’ve got all the basics down -pushing, turning, stopping, and slowing down - it’s important you practice these often to keep your move fresh.
Try different speeds, new terrain, and even introduce some obstacles to add some extra flare.
Whatever you do, practice, practice, practice. That way, you’re ready for the next step.
9) Try Beginner-Friendly Tricks
Now that you’re a master of the basics of skateboarding, it’s time to reap the sweet benefits of your diligence and do some tricks!
Here’s a video with five of the easiest tricks to learn as a beginner.
On top of that, and the trick everyone wants to pull off once they learn to stand on the board, here’s a video on how to ollie.
Two Beginner-Friendly Boards
1) Krown Rookie Complete Skateboard

Coming in at 7.5-inches wide x 31-inches long, the Krown Rookie Complete is a good starter board for people who want a quality skateboard without breaking the bank.
It comes with a deck made out of sturdy maple wood, heavy-duty aluminum trucks, 52mm 99A high-rebound urethane wheels, and ABEC-7 bearings.
Anyone just getting into skating who wants to test the waters and still have a worthwhile board should check out the Krown Rookie Complete.
2) Cal 7 Complete Standard Skateboard

Another sweet board that will serve beginners well is the Cal 7 Complete Skateboard.
It comes in various widths so pick one that matches your foot size and skating needs. It includes 52mm 99A wheels, 5-inch tumble finish trucks, ABEC-7 carbon bearings, and risers pads to prevent wheel bite.
It’s slightly more expensive than the Krown Rookie, but the quality of the board is worth the extra money.
If you’re a beginner looking for a good starter deck, consider giving the Cal 7 Complete a buy.
Conclusion
In the end, learning to ride a skateboard takes time, practice, and a desire to do some really cool stuff. It’s a lot of fun but it may not happen overnight for everyone.
But, a little elbow grease, and elbow pads, goes a long way.
Remember to perfect the basics before trying more difficult tricks; use protective gear to prevent severe damage; and, most importantly, to have fun.
You have the tools now.
Go out there and be awesome.
Tom Rohrer breaks down every step of a nollie treflip (nollie 360 flip)–from foot position, weight distribution, shoulder position, and popping and flicking technique in his latest YouTube tutorial.
Check out his Tom’s Tutorials channel for more skateboarding tips and tricks.
Tom Asta is back to help you get better at skating. This time, he goes beyond the basics and teaches viewers how to improve their ledge game. Watch the video above, and check out his channel for more of his skateboarding tutorials.
Tom Asta continues to share skating tips and tricks on his YouTube channel. This time he covers how he goes about nollie skating on ledges, bumps and handrails!


How to Do a Nollie Treflip
Tom Rohrer breaks down every step of a nollie treflip (nollie 360 flip)–from foot position, weight distribution, shoulder position, and...

Improve Your Ledge Game with Tom Asta’s Tips
Tom Asta is back to help you get better at skating. This time, he goes beyond the basics and teaches...

Tom Asta Shares the Keys To Skating Nollie
Tom Asta continues to share skating tips and tricks on his YouTube channel. This time he covers how he goes...
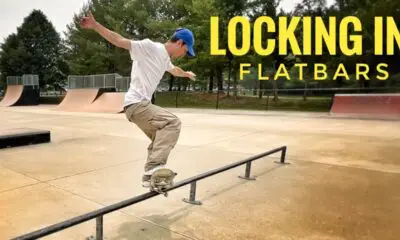

Tom Asta Shares the Keys to Locking In Flatbars
Tom Asta continues his mission to share his skateboarding knowledge on his YouTube channel. This time around, he imparted the...

Matt Beare Bares the Secret to Taking Flat Tricks to Other Spots
In his latest YouTube video, Matt Beare of “The Daily Push” bared the secret to taking flat tricks to other...

Learn How to 360 Flip from P-Rod
Paul Rodriguez gave tips and tricks on how to execute the 360 flip in his latest YouTube video. The Primitive...
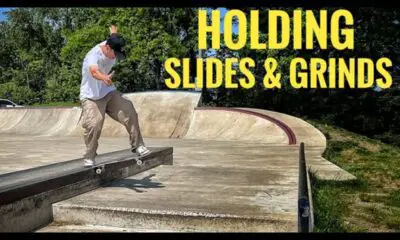

Tom Asta Shares the Keys to Holding Slides and Grinds
In his latest video, Tom Asta shared the keys to holding slides and grinds. You can watch more of Tom’s...

Tom Asta Explains the Break in Process for New Trucks
In his latest Youtube video, Tom Asta breaks down the process of breaking in new trucks. Tom has been sharing...

Kevin Braun Shares His Favorite Skateboarding Spots

Vans Skateboarding x Spitfire Wheels

Baker Has a Death Wish Part 2

Tony Hawk and Rodney Mullen Team Up for ‘Darkslides & Secret Tapes’

Giovanni Vianna’s Top 5 SLS Scores of 2023
Kevin Braun Shares His Favorite Skateboarding Spots
Get the inside scoop on Kevin Braun’s top skateboarding spots and the epic tricks that he executed there in this...
Vans Skateboarding x Spitfire Wheels
Vans Skateboarding and Spitfire Wheels have teamed up to create a durable and adaptable footwear and apparel collection that draws...
Baker Has a Death Wish Part 2
After 16 years, Baker and Deathwish delivered another must-watch video. “Baker has a Deathwish Part 2” runs for more than...

Lucas Alves “Illuminated” Powell Part
Lucas Alves performs incredible stunts on California’s proving grounds and ends with a powerful finale in Hollywood in his “Illuminated”...

Rough Cut: Ishod Wair’s ‘Spitfire’ Part
Get behind the scenes of Ishod Wair’s Spitfire part in this rough cut released by Thrasher Magazine.